Spark Instructor HelpSkip to start of content.

Import Multiple Students

Add multiple students to your course at the same time by uploading a roster CSV file.

Some schools require an access code for each student. If your school requires access codes, your Spark administrator must provide a list of access codes.
  1. Select a course in Spark.
  2. Click User Management.
  3. Click Import Expand > Students.

    The Import Students menu opens.
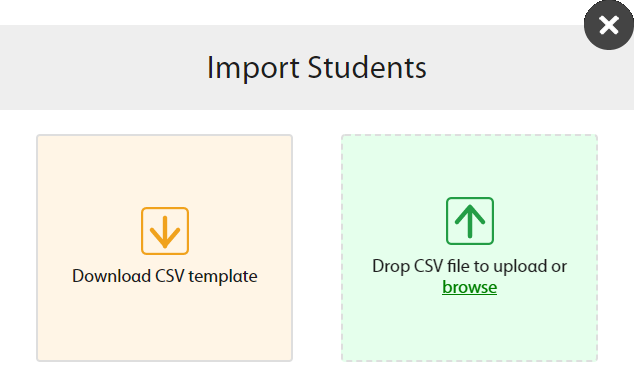
    Import Students menu with two options: "Download CSV template" and "Drop CSV file to upload or browse."
  4. Click Download CSV template.
  5. Open the template in a spreadsheet editing program such as Excel.
  6. Enter student information.

    You can add a student to up to three courses with the template.

    Username
    The username for the account.

    Usernames can include the following characters:

    A B C D E F G H I J K L M N O P Q R S T U V W X Y Z
    a b c d e f g h i j k l m n o p q r s t u v w x y z
    0 1 2 3 4 5 6 7 8 9
    ~ ` ! @ # $ % ^ & * ( ) _ - + = { [ } ] | \ : ; " ' < , > . ? / 
    First Name

    User's given name.

    Last Name

    User's family name.

    Email

    Optional: An email address where Spark can send the student a link to set their password, or verify their identity if they forget their password.

    Note Without an email address, the user cannot set, or reset their own password.
    Course Key 1

    Your course's 8-digit identification code.

    Course keys are shown on your dashboard after Key.

    Access Code 1

    A 10-digit code that verifies a student may access Spark materials.

    Not all schools require an access code. If you do not know if your school requires access codes, or need access codes for your students, contact your Spark administrator.

    Course Key 2
    Optional: A second course key is needed to add a student to a second course.
    Access Code 2
    Optional: If your school uses access codes, a second access code is needed to add a student to a second course.
    Course Key 3
    Optional: A third course key is needed to add a student to a third course.
    Access Code 3
    Optional: If your school uses access codes, a third access code is needed to add a student to a third course.
  7. Save your spreadsheet as a CSV file.
  8. Upload your file by dragging it to Drop CSV file to upload or clicking browse and selecting your file.
    Your upload has started and you will be sent a notification when it has completed. This notification will include details of any users which could not be provisioned successfully and the reasons for that.

    A message is shown in your Messages tab after each roster upload. It contains information about the created accounts or any errors.

    On the instructor dashboard, "Messages" has the label "1", meaning there is a new message.
  9. Check your messages to be sure all users were added successfully.
    1. Click the Messages tab, then click News.
    2. If your upload had errors, click the Error Report to download a report explaining each error in your original document.

      Common errors include not completing required fields or using an existing username.

      Correct your .CSV file and import it again.

    3. If your upload was successful, your message does not link to an error report.
Students in your roster are added to your course.