Spark Instructor HelpSkip to main content.

Create an Assignment Using Blackboard LTI 1.3

Create an assignment in Spark using Blackboard® LTI 1.3.

Prerequisite: Create a Course
Important To ensure student scores are captured in the Gradebook, do not create an assignment directly in Spark. Follow the steps below and create a direct link for your students.

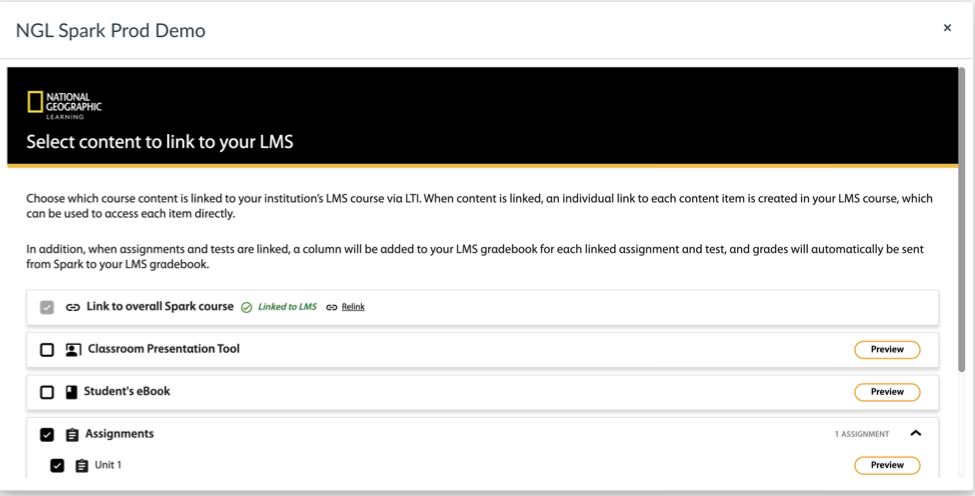
Launch the National Geographic Learning Content Selector

Before you can create an assignment, you must first lauch the National Geographic Learning Content Selector in Blackboard.

  1. Navigate to your Blackboard course.
  2. Add the content app.

    Blackboard Ultra

    1. Click +Add Content.
    2. Select Content Market.

    Blackboard Original

    1. Click Content.
    2. Click Build Content.
  3. Select the National Geographic Learning Spark content app.
  4. Scroll to the Spark program and level you want and click Link to Course.
  5. Click Select Content.

Create an Assignment

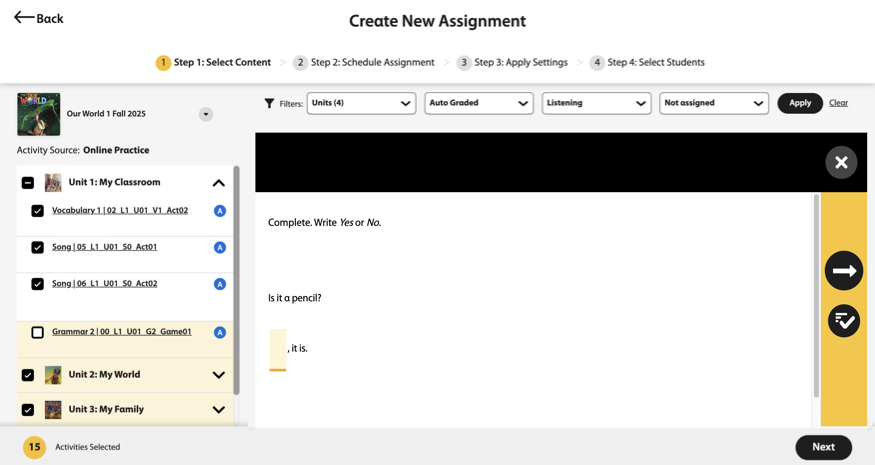
After you have launched the Content Selector, you can create an assignment.

  1. Click Create.
  2. Click New Assignment.
    Assignment menu with New Assignment button.
  3. Select content to add to your assignment.
    1. Use any of the following filters to view the activities you want:
      • Unit Number
      • Grading: select auto-graded or manually-graded activities
      • Skills
      • Assigned Status: select activities that are already assigned or not assigned
    2. Click Apply.
  4. Select the activities you want for your assignment.
    You can click the activity name on the left side of the page to preview it.
    Screenshot of the Content Selection page showing a list of filtered activities on the left and a preview of the selected activity on the right. Five out of six activities in the left-hand list are selected, indicated by checkboxes.
  5. Click Next in the bottom-right of the page.
  6. Enter the assignment’s basic information.
    Name
    Assignment title
    Start Date and Time
    When students can first access the assignment
    End Date and Times
    When the assignment is due
    No dates
    Optional: Students can access the assignment at anytime throughout the course.
    Notes
    Optional: Additional instructions for your students
  7. Click Continue.
  8. Apply the assignment settings.
    Activity attempts
    How many times students can attempt the activities within an assignment
    Show correctness marks
    When students can see if their answers were correct
    Show correct answers
    When students can see the correct answers
    Note For games such as crossword puzzles, students are only allowed one attempt to complete.
  9. Click Continue.
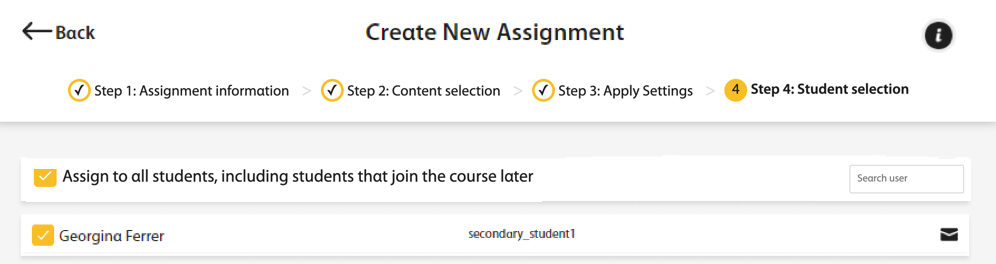
  10. Select the students who should complete the assignment. Select Assign to all students, including students that join the course later, or select individual students.
    Screenshot of the Create New Assignment dashboard, Select Students step which shows a checked box next to Assign to all students, including students that join the course later. A list of student names below it are automatically checked.
  11. Click Assign to save your new assignment.
  12. Click Create Links.
  13. Scroll to Assignments and select the assignment you just created.
  14. Click Link to LMS.